zaterdag 23 februari 2019

Battle-worn painting tutorial (Barricades)

I've been asked a few times how I paint the battle damage and rust effects on my Barricades. Because I had a second core set I had to paint up more barricades and made a tutorial out of it. The techniques are really simple and anyone can pull this off if you know the trick.
Below I will take you through each step.


I used an airbrush to prime the model, give it some pre-shading and then put a thin base layer over it. If you don't have an airbrush just paint the whole model grey. The reason I use an airbrush on larger flat surfaces like that is that I can pre-shade and that gives more depth to the model. The effect is very subtle so you don't have to do this step.

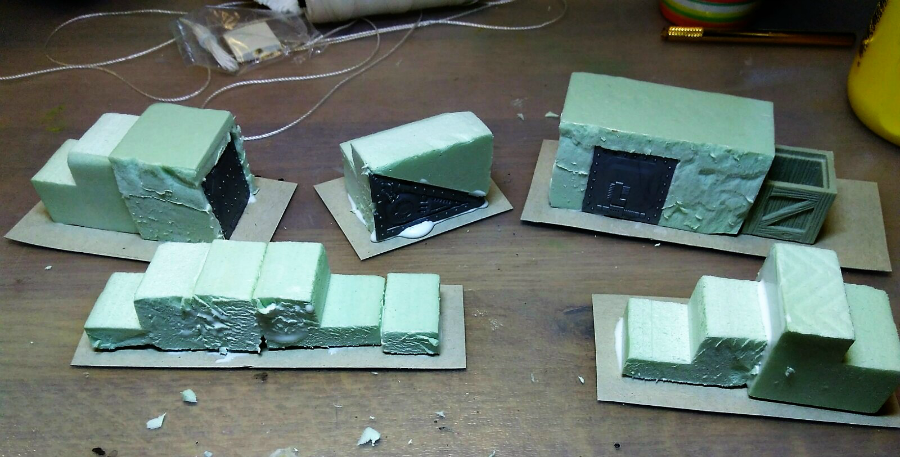
You can see the barricade on the left after I have painted the base layer over it. Here you can see the result of the pre-shading. a subtle effect. The barricade on the right is where we apply the next step. I dry-brushed the whole model with an ivory color paint. This adds an edge highlight to the piece.

To create more depth and contrast to the barricades I got out my number two favourite paint or actually wash (agrax eartshade is my number 1 if you were wondering). Get a small brush and let the wash run araound all the edges of the model. Make sure not use too much wash because it will pool. You can make a few oil leak streaks on the model coming from the grill bits using the wash. 
To add battle damage or worn look to the barricades you get a dark brown color, I used Black Brown and you get a piece of fine sponge. Get some paint on the sponge and dab it on a piece of kitchen towel first then dap it on a few place on the barricade. As you can see in the picture above you can achieve this look in just a couple of seconds. If you want to do this with a brush it would take you much longer and would be a lot harder to achieve. If you want to add extra detail you should get a small brush and some light grey/white paint and paint a few lines right underneath some of the pathes. This gives the impression of the paint chipping off. I didn't do this on my barricades however.

So far so good and most painters use the sponge trick so nothing new there but very few painters use oil paints as we always use acrylic paints but for the next step you should get some oil paints. Get a color that looks like rust (or maybe two) and put a few tiny dots on the model that you want to be the top of your rust streak. You can see it in the picture above but you'll have to look hard.

Because oil paints dry really slow you don't have to rush. You should also get some odourless white spirit that you can get in any hobby/craft store. Wet a large flat brush with some white spirit and and run it from top to bottom over the small dots of oil paint in the direction that you want your streak. You will instantly see the streaking effect. Because the oil paint doesn't dry quickly you can really work it. Pushing it around and if you make a mistake you can just whipe it off and start over. It's really easy and gives a great result. If you have done this on one of you models you will probably want to experiment with other colors to make other effects. (white oil paint for water streaks and black for oil stains for example). Even if you don't like the results the next day you can take a swab with some white spirit and remove it with a few rubs. Oil paints will just be another tool in your toolbox.

As a final step I have taken some metal color paint to add to the areas that we used the sponge technique on. It will make it look like fresh scratches. You can see it in the picture above but you'll have to look closely, I didn't want to over do this effect.

Now your battle worn barricades are ready. The barricades have a computer panel and some flashy lights on the back that you can paint but I'll leave that to you. On the left a bit of inspiration from my barricades.

vrijdag 22 februari 2019

Emperor Palpatine painted

Emperor Palpatine painted
CLICK TO ENLARGE
This miniature marks a new era for my Legion gaming. I have been painting rebels till this point and it only seemed fitting to me to start my Empire army with the big boss himself. I started the Rebel army with Luke Skywalker.
In the movies you can witness his transformation from the much loved senator from Naboo (sheev Palpatine) to the dark lord of the Sith (Darth Sidious) during the first three episodes. On the painting desk it took less then 3 hours start to finish.
Although painting this miniature meant using a lot of black and grey shades it was still fun and pretty quick. (I know the emperor should have a black cane but I wanted to make it look like wood)

UNLIMITED POWER!!!!
The only place you can really add some detail is in his face so I tried my best on that. I mixed in grey with skintone paints and then washed it with agrax eathshade, repainted the raised areas and washed the eye sockets with reikland flesh. then just worked my way up using lighter paints with each coat.

I'm looking forward to field him in games together with the imperial royal guard.

donderdag 14 februari 2019

DIY Cargo scatter terrain

Let's make some terrain pieces, Cheap and quick guide.
(click to enlarge)
In this tutorial I'll show you how to make your own Space Cargo scatter terrain but you can really do this for any wargaming scene you like. Since this is a Star Wars Legion Blog it wil be Space Cargo and will be mixed with my other space cargo. It will look good on the Tatooine markets or Space ports. Let's get started.

One of my favourite things in this hobby is making things myself. I ussually get an idea and then simply have to make it. I want to make my Tatooine buildings look a bit better by adding some tent cloth here and there. I haven't done that yet because I also had another idea for  using paper napkins and lots of glue.

These pieces can be created in just a couple of hours and it isn't a lot of work. You can really easily do this as a side project because you work on it for a bit and then have to wait a lot for the glue, paint and washes to dry. This is a project you can leave to dry and then come back to it again.

This is what you'll need:
-Foam
-PVA Glue
-Thin cardboard (I used a pizza box)
-String/cord/wire
-Paper towel/napkins
-Bitz to make it more interesting(optional)
-Knife
-Scissors
-Brushes
-Primer
-Paint
-Washes
-A SWLegion miniature (to check heights and measurements)

So as you can see these items will hardly cost you anything. You'll probably don't even have to go out to buy anything as most wargamers have plenty of this stuff.
Basic shapes for the cargo pieces done
First you start by cutting the foam in basic shapes like you can see in the picture above. I glued them to a piece of cardboard from a pizza box. The cardboard will be the base of your piece. just make sure that the piece of cardboard is large enough to fit the foam and some space around it that we will use for draping the cloth over. It's handy to have a legion model at hand to check the seize and heights of the pieces your making. you'll want some to hide your models behind completely and some that they can shoot over from behind.
in the picture above you can also see that I added some spare bitz. I used some pegasus hobby components and some wooden crates that I still had. These will make the pieces look more interesting but aren't necessary.
Once your basic shapes are ready you can start with the glue. I mixed my PVA glue with water so it will be easier to use. Put glue all over the piece where you want to add cloth and then drape a paper towel/napkin over it. You then cover the whole paper towel with more watered down glue. Make sure you get all the creases and folds just the way you like.
Then take a piece of string and put that around your piece so it will look like a rope securing the cloth over the cargo.
Once this is done you can leave it to dry. after a couple of hours your piece should be dry and you add another layer of watered down PVA glue over the whole piece including the ropes, leave to dry and later add a third coat of glue. This might seem a bit overkill to you but what it will do is make your fragile piece rocksolid and firm. It will feel like a piece of plastic.
As you can see in the picture above I added some more wooden crates (1). These will look really good on your pieces. As you can also see there is still some of the pegasus hobby panels visible from under the cloth. not necessay but will all add to the piece.
When you look at the lower bit of the picture (2) you can see I trimmed the cardboard base to an organic shape, just as the cloth is draped on the ground. Your piece is now ready for painting.
looks a bit shiny and white because of bad lighting
The PVA coat makes the piece very shiny and smooth so I advise you to use a primer before you paint it. I used Vallejo primer and then painted everything in it's base colors. When dry I washed the whole piece with watered down Agrax Earth wash. Then I did a heavy drybrush with the same base colors and then a light drybrush with a 50/50 mix of the base color and white. you can now pick out a few details if you like but the piece is done and can be used on the table.

Here are some pictures of my pieces used in Legion games:
Space Cargo....any smugglers dream!

Star Wars Legion Cargo terrain

Star Wars Legion Cargo terrain


zaterdag 9 februari 2019

The Alliance Tournament Legion's First


Last weekend I went to the Alliance tournament, a large scale 40K tournament which had a Star Wars Legion small side tournament. The venue was great. Under an hour drive from my house which was nice for a change as most of the wargaming convetions and tournaments are usually over 2,5 hours drive from my house. The venue itself was great. The Schiphol hotel felt very luxourious compared to the gaming stores I normally go to. The tournament had 120 players for 40K and a whole whopping ........4 for Legion. definately something we need to work at promoting our game. I think we can draw more people in these tournaments when we ditch the whole tournament setting and name. Let's just call it an "event day" or "campaign". there aren't a lot of hardcore players for Legion and most people shy away from these tournaments because the feel inadequate and don't know the rules well enough. Most of the players in the tournaments however are more then happy to help new players and coach opponents through any game situation.  

There were 3 tables set up for legion. I had offered to bring my Tatooine table and so I came to the tournament half an hour early to set it up. The other tables looked good as well so we were set to have a lot of fun.

The organisation of the 40K tournament was great. all tables had a lot of nice looking scenery on it, every round started of with a very nice mission briefing video, there was a website with live updates of the player rankings, we all got water bottles to stay hydrated and the buffet...oh wow, that alone was well worth the ticket price. I'm definately going again which I believe will be May 4th for a special star wars themed event day.

This table on the left was set up by Tabletop Kingdom as a star wars legion demo table. It looks great and has a lot of nice looking line of sight blocking scenery on it. Over the event it even drew some attention from the 40K players curious about the Legion gaming rules.
The second table as a snowy cargo spaceport table. The lay out of the table was good but it had lot's of wide open spaces.
Table 3. My Tatooine table
CLICK TO ENLARGE
The third table was my tatooine table. The gaming mat was supplied by the tournament organisation. I got a lot of nice comments about the table and the players had fun playing on it. Having other people enjoy using my terrain give me a really good feeling so I'm hoping to add some more terrain to the "Mos Alta" table and continue to work on my industrial space table so I can bring two tables to the next event.

Below are some random shot's of my gaming table and below that some pictures of how my games went.


I tried out a new list which I never played before. I decided to field the wonder twins for the first time. I had Luke and Leia in the command slots, a sniper and proton strike team with a unit of wookie warriors filling out the special forces slots. Than a unit of fleet troopers and 3 units of rebel troopers each with a Z-6 and extra man in the unit.

For my first game I was watch up against Frank's imperial forces. He had a list with palpatine, royal guards and Boba Fett and filled the rest of the list with 2 sniper teams and storm trooper units. 
All I can say aboout the game is that I had a plan and everything went my way in this game. My units were in the right range all of the time. The timing of my command cards played out wonderfull and the fact that Frank rolled really bad with his red defence dice helped a lot too. I rolled up his army in round three. The plan worked and I was very fortunate with my dice rolls. 


My second game was against Joost who also had an imperial list with Veers, Boba Fett, double speeder bikes, an E-web, sniper team and couple of bare storm trooper units.

For this game a didn't really have a plan. I layed down a lot of fire towards his speeders and Veers but I was unable to criple any of them. On the other hand I lost most of my trooper unts pretty quickly and ended up with only my commanders, Luke & Leia with the Wookies at the last turn. My opponent outscored me on objectives and the game was lost.


The last game was against Hielke, an opponent I had faced before. In the previous tournament I had beaten him because I payed attention to the objectives and the clock. We had to end that game before it was turn six.

This time we started our game half an hour late and I had to quit half an hour early because I had other things to do that evening. We took 15 minutes to deploy and then only had an hour left to play. Because that's really short for a game of Legion we both made descicions we normally wouldn't. Both armies raced to the middle and all caution was thrown in the wind. 
It was really cool to play against a beautifull painted army on my table and I still enjoyed it even though it was too short.


I would like to thank the tournament organisers and tabletop kingdom for making this possible and hope we can grow our Legion-event-days from here. You guys are great, thank you! If they ever need any assistance in the future with other Legion events I will happily help them.